Outlining text can actually mean two different things: creating (or converting to) outlines before sending off for print or making your text look outlined.
Creating Outlines
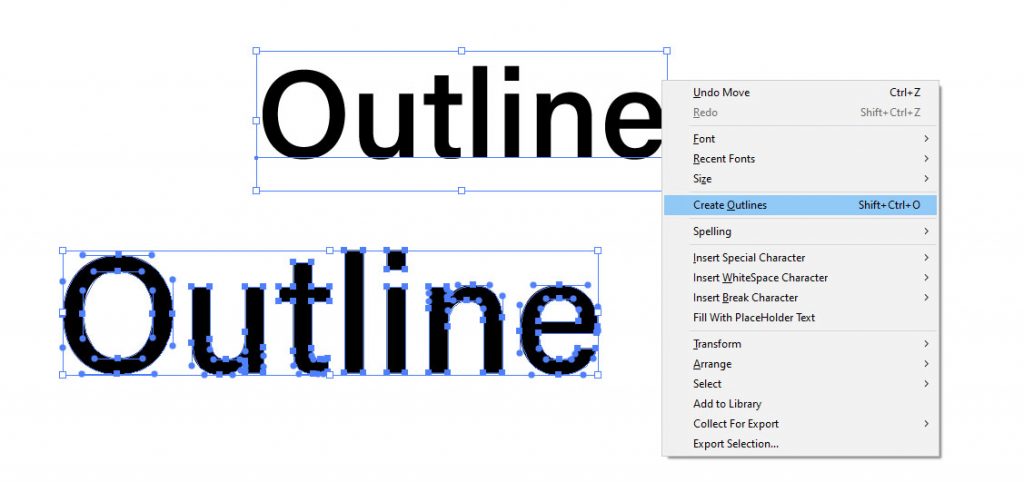
A common requirement before submitting your files for printing is converting your text to outlines.
This is actually easily achieved in one step.
Select your text and go to Type > Create Outlines or press Ctrl/Cmd+Shift + O.
You can also right-click on the text and select the same option.
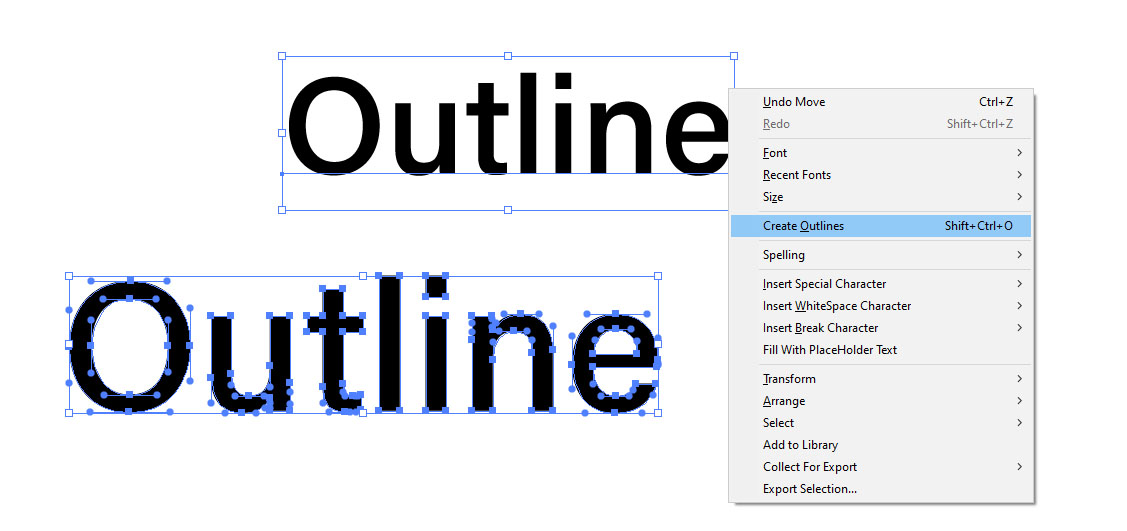
What creating outlines means is that your text is converted into its constituent vector paths. They can be opened on any computer without the need to have the font you’ve used installed on it. The text however will not be editable anymore, although the curves outlining the letters can be edited as normal paths, you’ll not be able to simply rewrite the words.
If you have a lot of different text fields in your file, you don’t need to hunt them down individually, go to Select > Object > All Text Objects. Or simply press Ctrl/Cmd + A to select everything, then press Ctrl/Cmd+Shift + O and any text will be converted to outlines.
Note: objects must not be locked in order to be selected. To unlock all objects go to Object > Unlock All.
Outlining text
In case you wanted to actually make your text outlined, there are a few simple manipulations that let you do that.
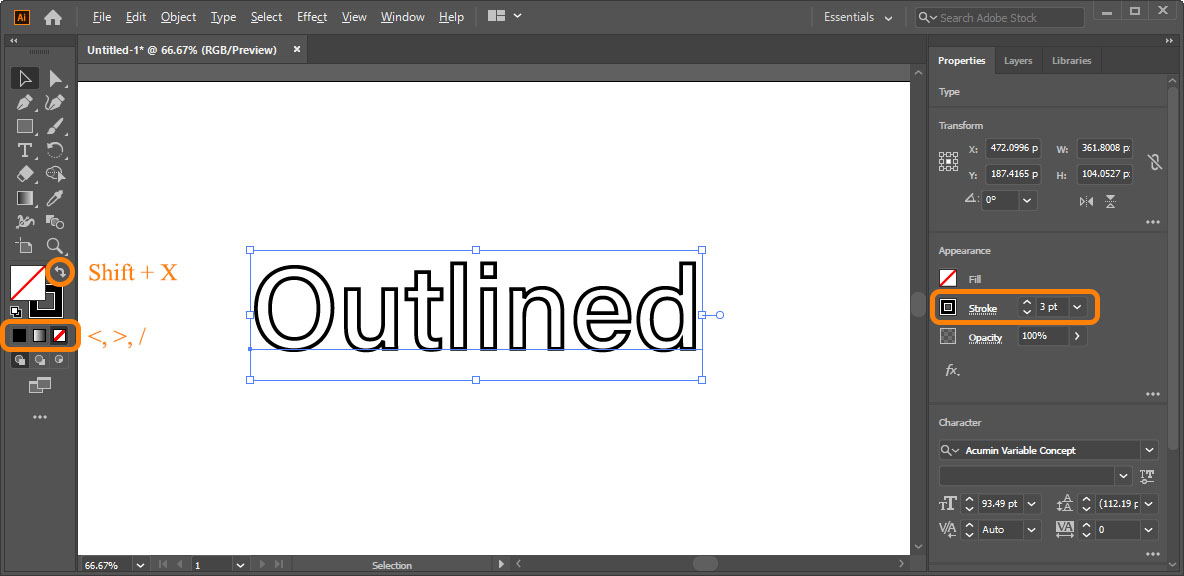
First off, try selecting your text and pressing Shift + X. What this keyboard shortcut does is swaps it’s fill and stroke. You can do the same by clicking the arrows ikno to the top-right of the Fill and Stroke near the bottom of the Toolbar.
However, it only works properly if you only have some color fill on your text and want to have it outlined with the same color. Your color situation might be different, the point is, it’s the Stroke that is responsible for making your text outlined.
You can set fill to [No Fill] by choosing the appropriate swatch, choosing it on the Toolbar or pressing keyboard shortcut / (knowing thse keys will make your life easier: <, > and / at the bottom-right of the keyboard are responsible for Color, Gradient and None, while the X key switches between Fill and Stroke). Or you might choose to make it a different color, but to work on your outline you’ll need to work on the Stroke. Or Strokes.
Strokes
There’s actually a whole separate panel in Illustrator responsible for strokes. It shows up if you press the word Stroke with a dotted underline either on the Properties or the Control panel.
You can also recall it as a separate constant pannel by going to Window > Stroke. Click two arrows to the left of the panel’s title to expand it and show all the options.
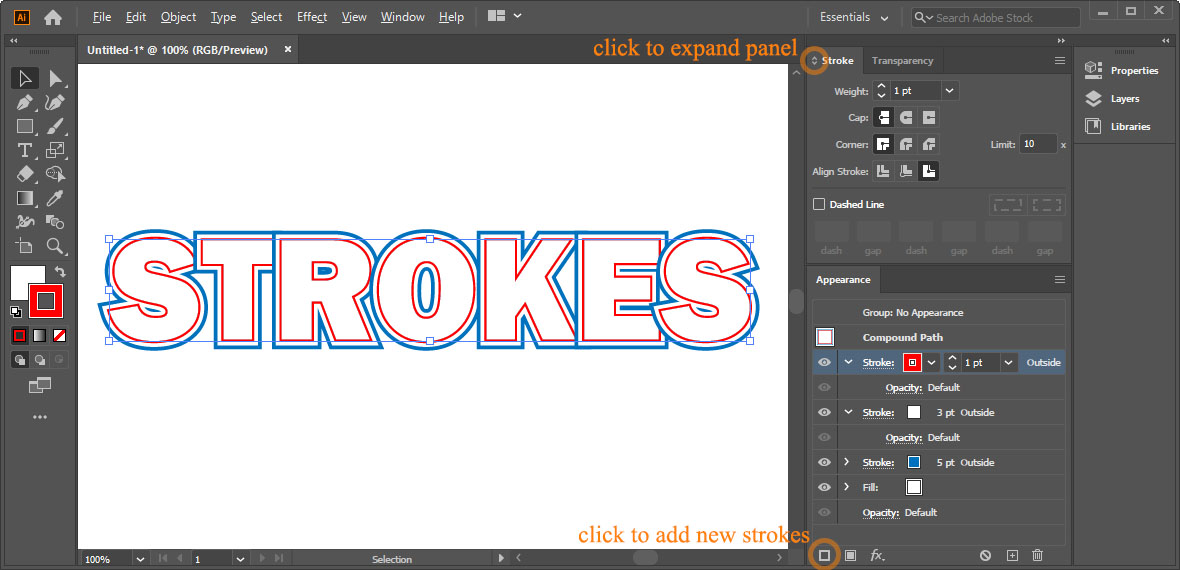
There are three important parameters there inregards to text:
1) Weight – fairly obvious, it’s the stroke’s width. Note that you can input fractional values, like .25 or 1.7
2) Corner – whether corners of the outline will be rounded, cut or sharp.
3) Align Stroke – wheter the outline will go aong the outside, the inside or the center of the path. Aligng stroke to the outside or inside will only work
Note: to make outlines of the outlines i.e. strokes go to Object > Expand.
And if one stroke isn’t enough, go to Window > Appearance. This panels controls appearance of your objects on a deeper level.
- Convert your text to outlines.
- Double-click Contents
- Click Add New Stroke.
You can add as many strokes as you want, give them different colors and properties and change their order by clicking and dragging (Alt/Option-drag to copy).
Width Tool
If you want to give your strokes an artistic effect, try Width Tool.
- Convert your text to outlines and give it a stroke.
- Select Width Tool on the Toolbar or press Shift + W.
- Click and drag on the stroke to change its width. Hold Alt/Option to restrict the tool to one side.
Go to Object > Expand Appearance if you want to convert the result to outlines.