There is actually a surprising amount of ways to combine, group or merge objects together in Adobe Illustrator which can lead to confusion. But there is a couple of very common, quick and easy, and the rest we will clear up if you need them.
Grouping
The number one method of combining objects is simple grouping.

- Select your object using the Selection Tool (V). Hold Shift to add to selection.
- Go to Object > Group or press Ctrl/Cmd + G.
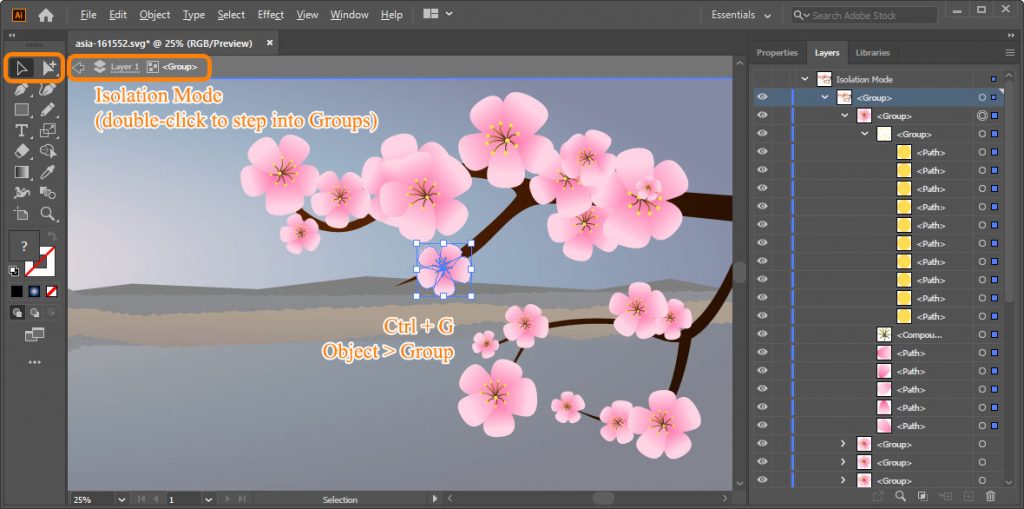
Note that groups can contain groups within themselves and form a hierarchy which you can see on the Layers panel (Window > Layers or F7).
Grouped objects will be selected as one by the Selection tool, from the top of the hierarchy. To get to the objects down the hierarchy, there are two main ways besides ungrouping (Ctrl/Cmd+Shift + G)
1) Double-click the grouped objects to enter Isolation mode. Double-click again to enter even lower groups. Double-click outside objects to exit Isolation Mode.
2) Use Group Selection Tool to select objects from the bottom of the hierarchy (alternatively use Direct Selection Tool (A) while holding Alt/Option). Click again to select the whole group that object is in. And again to select group that group is in and so on.
Shape Builder
The quickest, easiest and most modern way to merge objects into one is using the Shape Builder Tool.
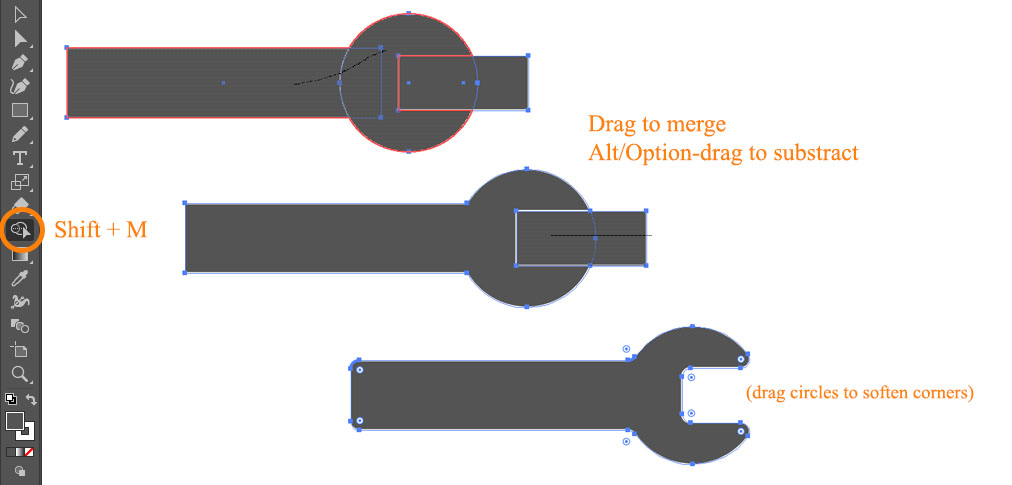
- Select your objects.
- Select Shape Builder Tool (Shift + M) from the Toolbar.
- Click and draw across your shapes to merge them. Hold shift before clicking to add shapes using rectangular marker. If you want to substract shapes, hold Alt/Option key.
This method combines shapes into a single path. It also merges their appearance based on the top object.
Pathfinder
Pathfinder is the older and possibly slower way but it also has more options. Go to Window > Pathfinder to open the Pathfinder panel.
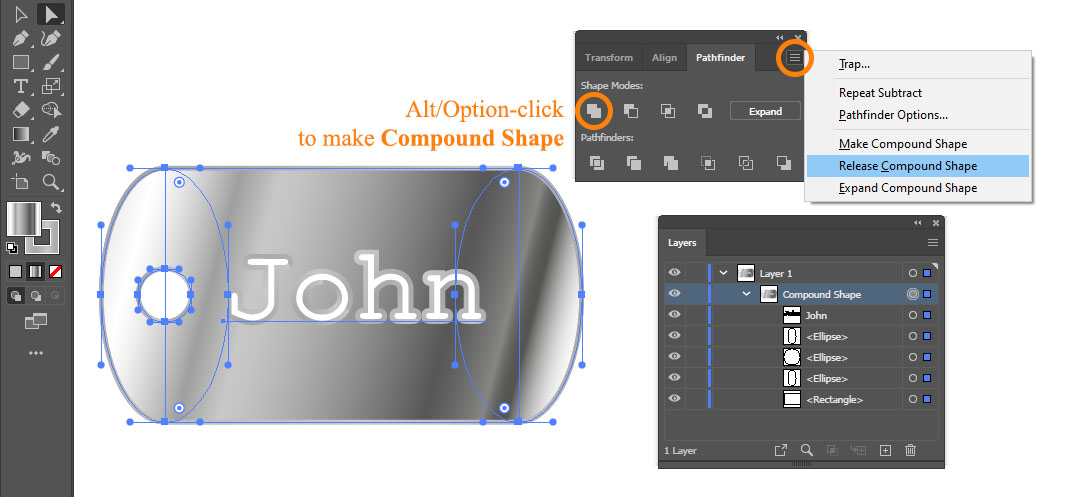
With your objects selected, click the Unite button. Again, objects will combine into one the same way as with the Shape Builder. But If you Alt/Option-click the button, you will create a Compound Shape which will maintain the original objects and let you edit them and assign them different Modes such as Substract, Intersect and so on. Click Pathfinder panel’s option button and choose Release Compound Shape to revert objects to their original state.
Shapes, Compound Shapes, Paths, Compound Paths
All of these things found in the Object menu and also in your artwork is a big source of confusion so let’s clear this whole area up.
- Shape is an object such as circle or rectangle that has special properties seen on the Transform panel (Window > Transform). Expanded Shape won’t have those properties anymore (shapes edited on a path level i.e. with the Direct Selection Tool are automatically expanded).
- Compound Shape actually has nothing to do with the Shape object and is a specifically Pathfinder object described above.
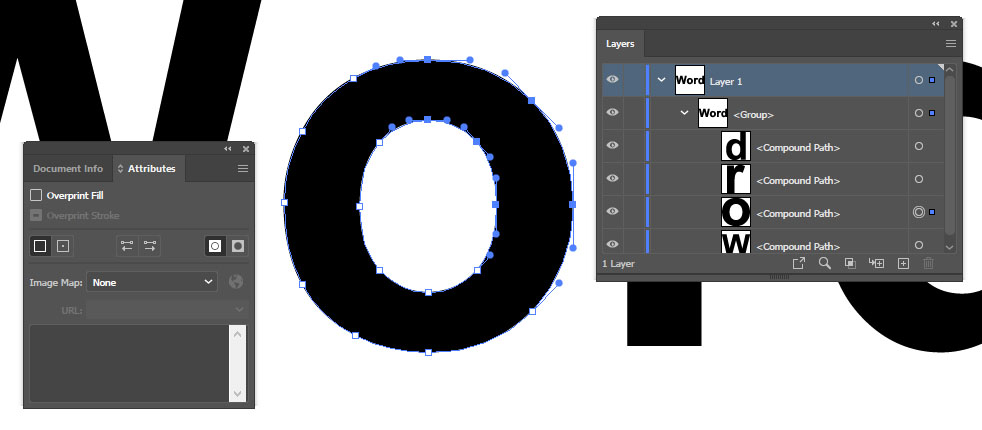
- Path is the most basic object in Illustrator. Just a single uninterrupted curve which can be open or closed.
- Compound Path is a special type of combination of two or more paths (though you can make it out of one path to no result). A common example of a Compound Path would be the letter O that consists of two paths, inner and outer circles with the space between them filled with color. It differs from simple Group object in that it fills the space between paths automatically and unlike Compound Shape filling is based on simpler rules and paths attributes accessible in Illustrator using the Attributes panel (Window > Attributes).
So in summary, there are 3 ways to group objects: Group, Compound Path and Compound Shape.
The Compound Shape is created with Pathfinder, and once expanded turns into a single Path or Compound Path. Also, there’s another Group subtype called the Clipping Mask (Clip Group) where one object is used to clip the visibility of others. And to add a bit more, there are Layers and Sublayers but they have no effect on actually combining the objects if that makes you feel better.