Welcome to the ultimate WebEx productivity tools guide. Let’s start from the most frequently asked questions about WebEx productivity tools:
- What is WebEx Productivity Tools?
- How to install WebEx productivity tools on windows?
- How to install WebEx productivity tools on Mac?
- How to install WebEx productivity tools on Google Chrome?
- How can you join as an Attendee on WebEx?
This article will give you answers to these questions and provide you with a complete guide on how you can set up and use WebEx meetings and WebEx productivity tools on your preferred system and device.
What are WebEx Productivity tools?
WebEx productivity tools are the utilities and integrations that help you schedule, start, invite, and join your WebEx meetings quickly and easily using the desktop applications.
Cisco WebEx is an international online video conferencing and collaboration service that allows people to connect virtually worldwide. WebEx is a cloud-based collaboration suite that consists of WebEx Meetings, WebEx Devices and WebEx Teams merged with Cisco’s web conferencing platform.
WebEx also provides the facilities to interact using messages, file sharing, private group collaborations up to 3,000 attendees, recording the meetings with security encryption, and much more.
The productivity tools help you join your WebEx meetings directly from your desktop or commonly used applications without going to the site and logging in to your account. The desktop integrations and productivity tools that are available for use with Cisco WebEx are:
- IBM Lotus Notes integration
- Microsoft Outlook integration
- Instant messenger integrations:
- Lotus
- Google Talk
- Yahoo
- Skype
- Microsoft Lync/ Microsoft Office Communicator (OCS)
- Microsoft Office integrations for Word, Excel, and PowerPoint
- Microsoft Internet Explorer integration
- Google Chrome integration
- Mozilla Firefox integration
How to install WebEx productivity tools on Windows OS?

WebEx Productivity tool is an entirely separate package software from the WebEx meetings application. The first time you create and log in to your WebEx site, a pop-up asks if you want to install the tool now. However, if you didn’t download it at the first login, you can still easily download and install it anytime.
WebEx site automatically downloads and installs productivity tools in your system. To download productivity tools manually for your Windows OS, you can follow the below steps:
1. Before Installing WebEx productivity tools, make sure your system meets the following prerequisites:
- You must have installed WebEx Meetings
- You must have administrative privileges and access
- Your computer system should meet the minimum requirements for successful operation. Check your System Requirements and then log in to your WebEx site.
2. Go to the left navigation bar and under Support, select Downloads.
3. Under the Downloads page, go to the heading Cisco WebEx Productivity Tools and select the right package for Windows OS.
4. Save the Installation package.
5. Close WebEx and Microsoft Outlook programs if running.
6. Run the installation file having a .msi extension.
7. Accept the license agreement and follow the installation instructions for the Productivity tools.
8. Click Finish once the installation is complete.
Setting Up WebEx Productivity Tools on Windows OS:
Once the installation is complete, you can set it up using the following steps:
1. Search and run WebEx Meetings to configure the settings.
2. A window will pop up promoting your WebEx site URL.
3. Enter your WebEx site URL.
4. Enter your email address for WebEx and verify it.
5. Enter your NetID and password.
6. Click log in.
7. WebEx Productivity tools are now ready for use.
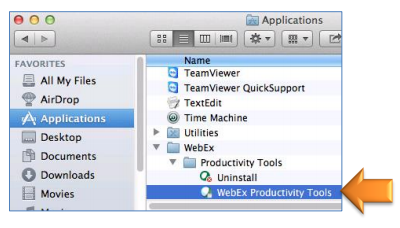
How to install WebEx productivity tools on Mac OS?
WebEx Productivity tools also come for Mac OS. The first time you create an account and log in to your WebEx site, a pop-up asks if you want to install the productivity tools now. However, if you didn’t download it for the first time still you can easily download and install it manually anytime by ensuing the following steps:
1. Before Installing WebEx productivity tools, make sure your system meets the following prerequisites:
- You must have installed WebEx Meetings
- You must have administrative privileges and access
- Your computer system meets the minimum requirements for successful operation. Check your System Requirements and log in to your WebEx site.
2. Go to the left navigation bar and under Support, select Downloads.
3. Under the Downloads page, go to Cisco WebEx Productivity Tools and select the right package for Mac OS.
4. Save the Installation package.
5. Close WebEx and Microsoft Outlook programs if running.
6. Run the installation file.
7. Accept the license agreement and follow the installation instructions for the Productivity tools.
8. Click Close once the installation is complete.
Setting Up WebEx Productivity Tools on Mac OS:
Once the installation is complete, you can set it up using the following steps:
1. Search System Preferences in the search bar.
2. Select Security & Privacy then go to Privacy and select Automation.
3. Checkmark WebExPluginAgent and Microsoft Outlook.
4. Search and run WebEx Meetings to configure the settings.
5. A window will pop up promoting your WebEx site URL.
6. Enter your WebEx site URL.
7. Enter your email address for WebEx and verify it.
8. Enter your NetID and password.
9. Click log in.
10. WebEx Productivity tools are now ready for use
Set up WebEx Productivity Tools for Microsoft Outlook ready:
Once you are done with installation and configuration with WebEx Meetings, you can easily integrate your Productivity tools using Microsoft Outlook.
1. Search and Open Microsoft Outlook.
2. Go to the Schedule meeting menu.
3. Select preferences dialogue box to set WebEx Productivity tools.
4. In the account tab, write your WebEx site URL
5. Enter your username.
6. Check the My Personal Room tab and confirm your
- Personal Room name
- Personal Room number
- Personal Room link
- Host pin
- Video address
7. To update your meeting room setting, click on Edit my Personal Room on the WebEx site.
8. All done, click ok.
How to install WebEx in Google Chrome browser:

The WebEx extension is available for famous browsers like Google Chrome to make your meeting scheduling easy. If you want to use the WebEx plug-in in your browser, you have to add the WebEx extension to your browser. By default, the extension is automatically installed with the installation of the WebEx Meetings Application.
Check the extension if installed or not:
Extensions are a potential threat to your online security, and browsers turn off malicious extensions to protect your privacy. There can be the case your browser has turned off the extension. To check the extension is installed and turned off or not, follow the given steps:
1. Run and open your Google Chrome browser.
2. Click on the More Options button at the top right of your Chrome window.
3. Select More Tools, and click on Extensions.
4. Check if the WebEx Extension is listed on the installed extensions list, if Yes, turn it on.
How to install WebEx in Google Chrome browser?
You can install the WebEx extension manually if the extension is not automatically installed during the desktop application installation. You can use the following steps:
1. Log in to your WebEx site dashboard
2. Go to the left navigation pane and click on Downloads.
3. Under the downloads page scroll down until you get the Cisco WebEx Meeting browser extension.
4. Click on the Add to Chrome button
5. You will be redirected to Google Chrome’s window with the link to the Cisco WebEx extension.
6. Click on Add to Chrome button.
7. Check the confirmation message and click Add extension.
How to add WebEx Extension in Firefox browser:
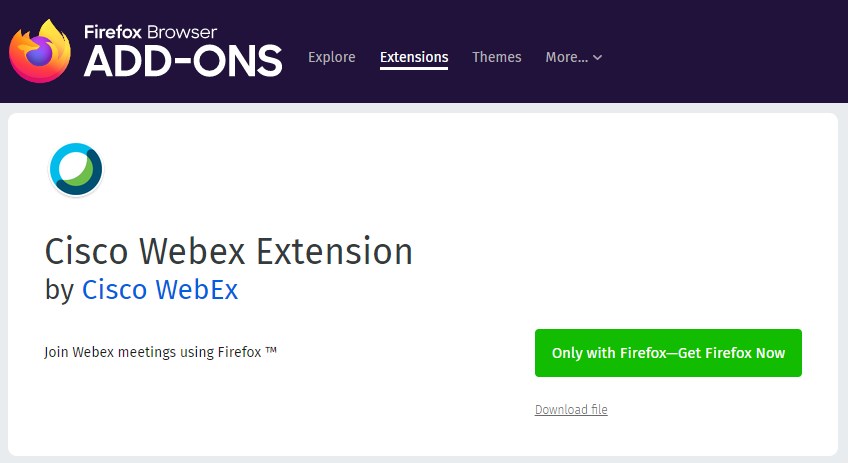
The WebEx extension is also available for like Firefox to make your meeting scheduling easy. If you want to use the WebEx plug-in in your browser, you have to add the WebEx extension to your browser.
By default, the extension is automatically installed with the installation of the WebEx Meetings Application. Check the extension if installed or not:
To check the extension is installed and turned off or not follow the steps:
- Run and open the Firefox browser.
- Click on the More Options button at the top right.
- Select More Tools, and click on Extensions.
- Check if the WebEx Extension is listed on the installed extensions list, if Yes, then turn it on.
How to install WebEx in Firefox browser:
You could install the WebEx extension manually during the desktop application installation if it did not install automatically. To re-install the extension, you can use the following steps:
- Log in to your WebEx site dashboard.
- Go to the left navigation pane and click on Downloads.
- Under the downloads page, scroll down until you get the Cisco WebEx Meeting browser extension.
- Click on the Add to Firefox button.
- You will be redirected to the Firefox window with the link to the Cisco WebEx extension.
- Click on the Add button.
How can you join as an Attendee?
You can join the WebEx meeting super comfortable through the following ways:
1. From an Outlook invitation.
2. Using WebEx Desktop Application
The role of an attendee is minimal; you are interacting in the meeting just as a listener. You can also interact with others through live video sessions, talk to other participants, but you can’t present anything until the host permits you.
WebEx Desktop Application:

The WebEx desktop application allows you to join and schedule, and start-up your WebEx meetings through Microsoft Outlook. It is specially designed for users who don’t want to go to the site over and over again. You can easily manage all of your meetings with the WebEx desktop app without going to the website.
How can you download the WebEx Desktop App?
You can download the application by following these simple steps:
1. Go to your WebEx site and log in to your account
2. Click on the Support menu on the top-left navigation bar.
3. Click on Downloads.
4. Under the downloads page, scroll down and look for Cisco WebEx Meetings Desktop App.
5. Click on the download button and select your OS (Windows or Mac).
How to join a Meeting through WebEx Desktop App?
Once you have downloaded and installed your WebEx Desktop application, you can join your meetings through the App. First, open the App and configure it with your Microsoft Outlook.
Now all you need is to open the App and enter meeting info under the Join a Meeting field. The meeting info can be the meeting link, meeting number, video address, or the host’s room ID.
What are different WebEx Meeting Options?
There are multiples modes to use WebEx meetings. It depends on what type of conservation you are going to do. Are you looking for just a casual discussion on the business reports, or are you conducting an official meeting that will include sensitive information about your company or business?
The two main WebEx meeting options available are:
- WebEx Personal Room
- WebEx meetings
If you want an open forum that anyone can join using a meeting link, the ‘WebEx meetings’ option is acceptable. But if your session is just for some specific group of people, the ‘WebEx personal’ room is the best option for you.
How to Schedule a Personal Room Meeting through WebEx App?
WebEx Personal Room is best to create virtual meetings anytime you want. You can invite anyone to your room meeting using the invite link or the nine-digit personal room number. You can also set privacy constraints on your meeting by setting a login password to your session.
You can create or schedule a WebEx Personal Room Meeting by following these steps:
1. Download and Install WebEx Productivity tools on your system.
2. Link and configure your Productivity tools to Microsoft Outlook.
3. Open Microsoft Outlook.
4. Go to your calendar and select your new meeting time, date, location, and subject.
5. Invite your attendees.
6. Click on the scheduling button to confirm your new meeting settings and attendees.
7. Click on the Add WebEx menu, then select Add Personal Room.
8. All done, send your link to your invitees.
The schedule for your meeting will be updated in your calendar. You can check all your scheduled appointments on your calendar. To start your scheduled session, click on the Join Meeting button, and enter your host key. If you want to join as an attendee, enter your attendee ID and password if required.
What are WebEx meetings?

WebEx meetings are the formal type of arrangements that are most commonly used for virtual conferences like official meetings; people sitting around a large table and interacting on a focused topic. You can arrange these meetings for tutorial sessions like teachers and students in an online virtual class.
WebEx meetings allow you HD video meeting sessions, audio, and screen sharing. A WebEx meeting is a virtual conference space with its own unique nine-digit meeting number. The host can also protect the forum from outsiders by enabling password protection.
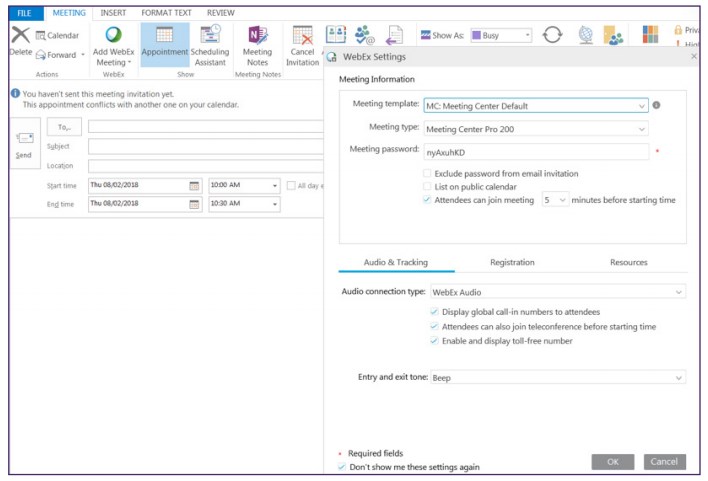
How to Schedule a WebEx Meeting via Productivity Tools?
You can schedule a WebEx meeting via Microsoft Outlook and the WebEx productivity tool anytime. You can start a session immediately or schedule in advance. Follow these steps to organize your WebEx meeting:
1. Download and Install WebEx Productivity tools on your system.
2. Link and configure your Productivity tools to Microsoft Outlook.
3. Open Microsoft Outlook.
4. Go to your calendar and select your new meeting time, date, location, and enter the subject name.
5. Invite your attendees.
6. Click on the scheduling button to confirm your new meeting settings and attendees.
7. Click on the Add WebEx menu then select Add WebEx Meeting.
8. All done, send your link to your invitees.
The meeting schedule will be updated on your calendar. You can check all your scheduled meetings on your calendar. To start your scheduled session, click on the Join Meeting button, and enter your host key. If you want to join as an attendee, enter your attendee ID and password if required.
How to Join a WebEx Meeting through Microsoft Outlook?
You can join a WebEx meeting through Microsoft Outlook linked with WebEx Productivity tools. To join the WebEx meeting through Microsoft Outlook, follow the below steps:
- Open Microsoft Outlook and open your calendar.
- Click on the Join Meeting button.
- The browser window with the WebEx dashboard or the WebEx desktop application window will pop up.
- Click on the Start Meeting button from the popped window.
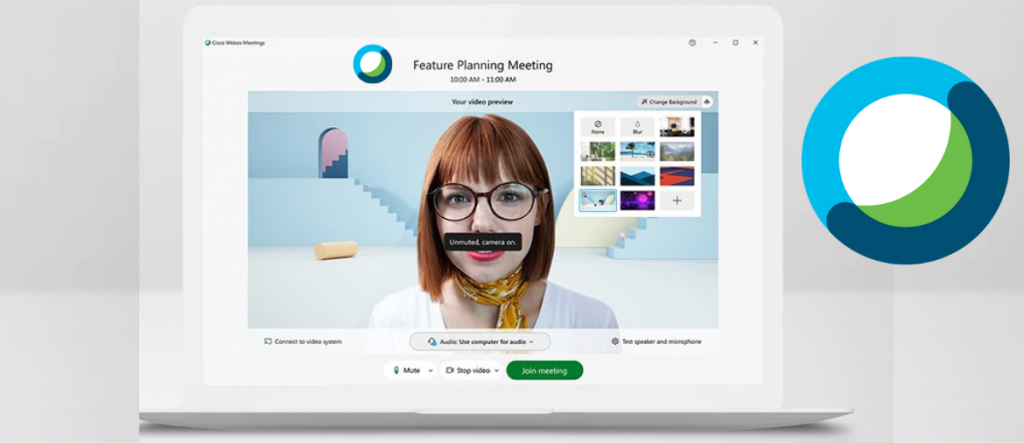
- Choose your Audio connection:
a. Use the Computer Audio option to use the system’s built-in mic and speakers.
b. Call-In option to use your mobile phone and enter your details.
c. Don’t Connect to the Audio option to avoid distortion if there are multiple audio sources in the same meeting.
Choose the video-sharing option to turn your webcam on or off.
Click the Join Meeting button.
How to uninstall WebEx Productivity Tools?
If you do not need WebEx productivity tools anymore, you uninstall them from your system by using the following steps:
i. Go to the start button and search Add or Remove Programs.
- Open Add or Remove Programs window.
- Search WebEx Productivity Tools in the list.
- Click on it and select Uninstall.
So, this is a complete starter guide of WebEx Productivity tools. I hope all your doubts are cleared, and you are all geared up to use this excellent application.