Selection is one of the most important parts, if not the most important part, in image editing, so it’s not surprising there are dozens of ways of selecting stuff in Photoshop. Here we’re going to review common methods, including some you might have not known, that will make your work easier.
First let’s begin with the basics in case we’ve forgotten something. It happens even to the experienced users. Especially to the experienced users.
Selection tools
The four tools located at the top of the Tools panel are selection tools: Move Tool, Marquee, Lasso and Quick Selection tools.
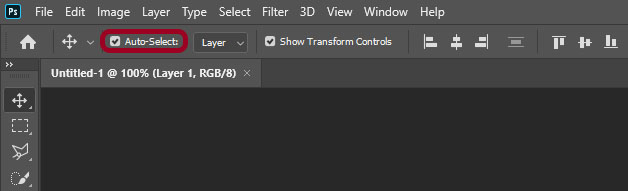
- Move Tool (V) – yes, move tool is a selection tool. In fact, one of the main tools for selecting layers for advanced users, more on that later. In the later versions of Photoshop, Auto-Select mode is on by default, which lets you select objects simply by clicking. If it isn’t on, look at the options bar at the top.
- Marquee Tool (M) – not only the first to-go tool for selecting, it’s the safest tool to have selected and not break something by accidentally clicking the mouse button. Did you know you can hold Space bar to adjust the marqee’s position while you draw it? Super useful.
- Lasso Tool (L), and especially Polygonal Lasso are still useful for quickly fixing your selection, like subtracting a small corner. With Poly Lasso, click to add points, press Backspace to remove points, Enter to close the selection.
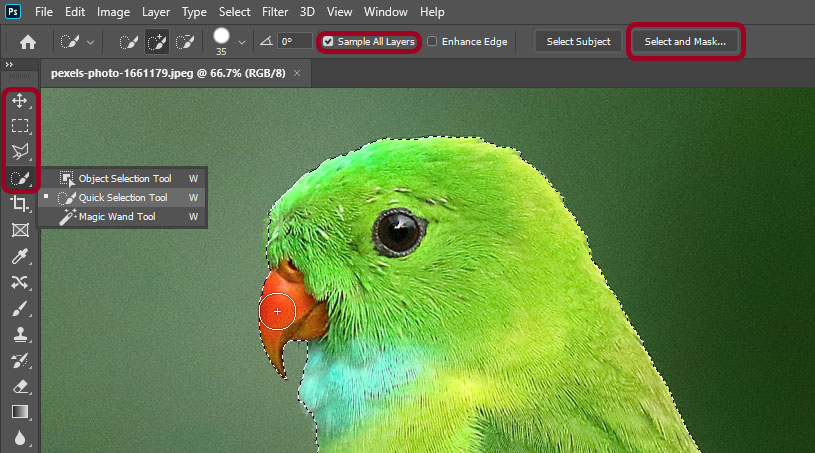
- Quick Selection Tool (W) – the number one tool for selecting anything in Photoshop nowadays, successor to the Magic Wand and predecessor to the new AI-based Object Selection Tool, it’s somewhere in between, smart enough to save you a lot of time and effort, but not too mysterious to still be able to predict what it’s going to do.
Make sure you’re on the right layer (or Sample All Layers option is on), and simply drag across your object and the tool will automatically detect edges and select areas. Decrease brush size using left bracket key [ and draw slower to select finer details. Increase brush size with ] key and move faster to grab whole objects. Hold Alt/Option key to subtract from selection. Use in combination with Select and Mask on the Options bar to refine your selection.
Tip: you can change brush size by holding Alt+Right-click (Ctrl+Option+Click in Mac OS) and moving your mouse/pen left or right.
With all the Selection tools, hold Shift to add to the existing selection, and Alt/Option to subtract.
Selecting Layers
- Remember Move tool? You can use it to select layers by clicking, but what you may not know, is that you can always temporarily switch to it from other tools by pressing Ctrl (Cmd) key. So if you’re using Brush Tool, you can Ctrl/Cmd-click on an object to quickly select it’s layer. And if Auto-Select is off for the Move Tool, which some users might prefer, use Ctrl+Alt+Right-click (Cmd+Option+Ctrl + Click on Mac OS) to select layers no matter what tool you’re using.
- To quickly select a layer below or above, use Alt/Option+[ or ]. Use Ctrl+[ or ] to move selected layer up or down
- Ctrl/Cmd-click layer’s icon to make selection out of layer’s contents. This works on masks too.
Pen tool
This may come as a surprise to many but Pen Tool is the main selection tool for professionals, because it allows you to draw smooth and precise lines and conveniently store selections as vector shapes. Here’s how to work with it.
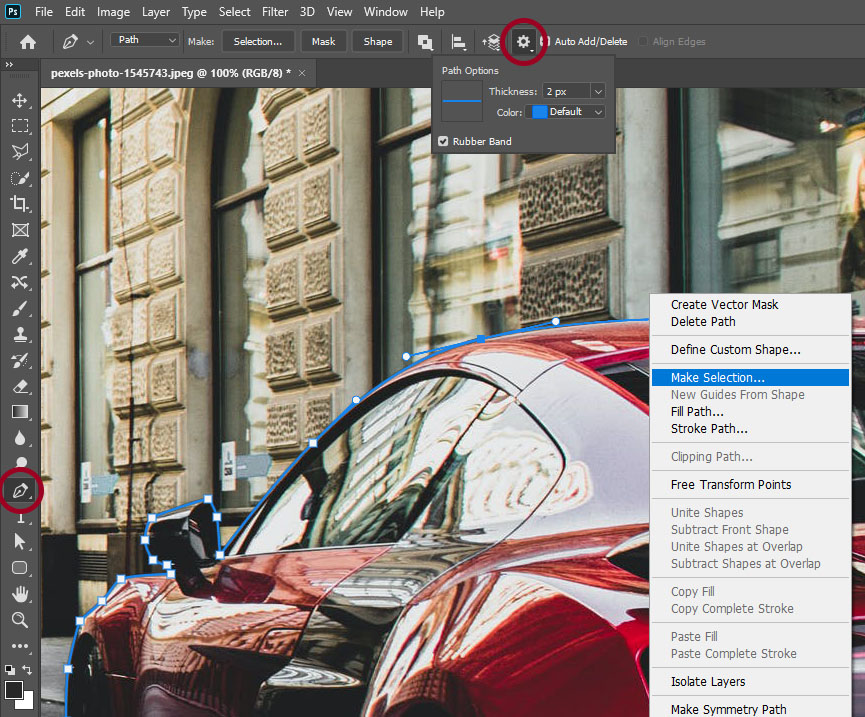
- Press P to select the Pen Tool. Click the gear icon in the Options bar for options. Rubber band and 0.5px thickness are usually useful.
- Click to add corner points, click and drag to create smooth points. Hold Ctrl (Cmd), Alt (Option), or Space bar to adjust points as you draw.
- At any point, right-click and choose Make Selection from the context menu, then press OK.
Boom, your vector path turned into a normal selection. You can use it as you please.
Go to the Paths panel to find your path again, use Direct/Path Selection Tool (A) to select and adjust vector paths.