Curving text is one of those things people want to use Adobe Illustrator for, since that is the app specifically intended to work with curves. And there are indeed many ways to curve text there for all sorts of scenarios.
Type on a Path
Not the simplest to use, but the most direct and customizable way to flow text along a curve. Usually this is the one you’re looking for.
To set it up, first you need a curve, or path. If you don’t already have a shape you plan to curve your text on in your artwork, create it using any tool you like. The Pen Tool (P) or Curvature Tool (Shift + ~) are usually the most handy ones to quickly create custom curves.
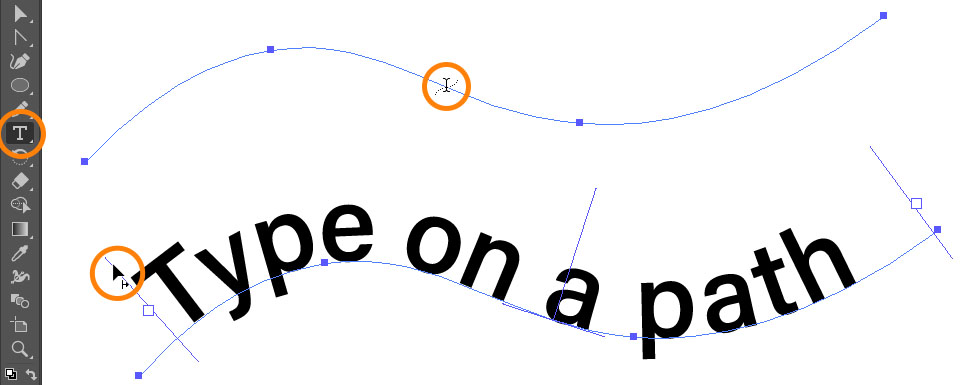
- Select Type Tool (T) on the Toolbar. If you click and hold or right-click on the type tool, you can find specifically Type on a Path tools, but you don’t necessarily need to select those.
- Hover your mouse or pen over the curve until the cursor changes to a text pointer with a dotted curve (hold Alt/Option key if it doesn’t). Click to create text on a path. Hold shift before clicking to create vertical text, where letters will go under each other.
- Type or paste your text.
Notice that the appearance of the shape you click on, that is strokes and fills and such, will disappear. You can add it back later if you need, or you can create a copy beforehand, go to Edit > Copy, then Edit > Paste in Place (Ctrl/Cmd+Shift + V).
Simple enough so far, but that is until you want to reposition your text on the curve. This is where it gets a bit intimidating, because there can be a lot of handles and gadgets around it with no obvious way to use them.
But it’s not really that complicated, all you need to pay attention to is three lines perpendicular to your curve, at the beginning, middle and end of it.
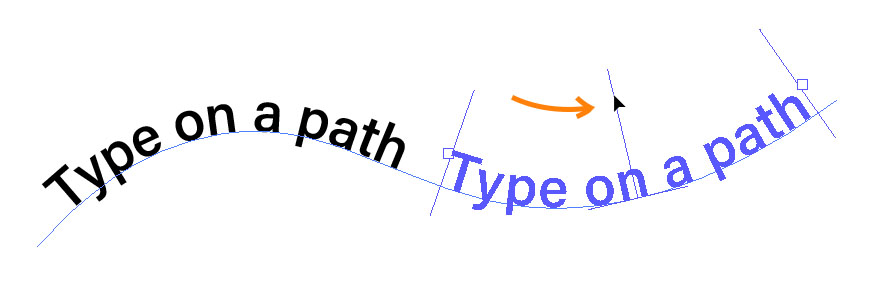
- Switch to either Selection Tool (V) or Direct Selection Tool (A). You can stick with Type Tool but press and hold Ctrl/Cmd key to temporarily activate the last used selection tool.
- Hover your mouse or pen over one of the handles until the cursor changes accordingly, then click and drag. Drag ones at the ends to control where your text starts and ends, an the one in the middle to position that strip along the curve. You can also drag the middle one over to the other side of the curve to move your text there.
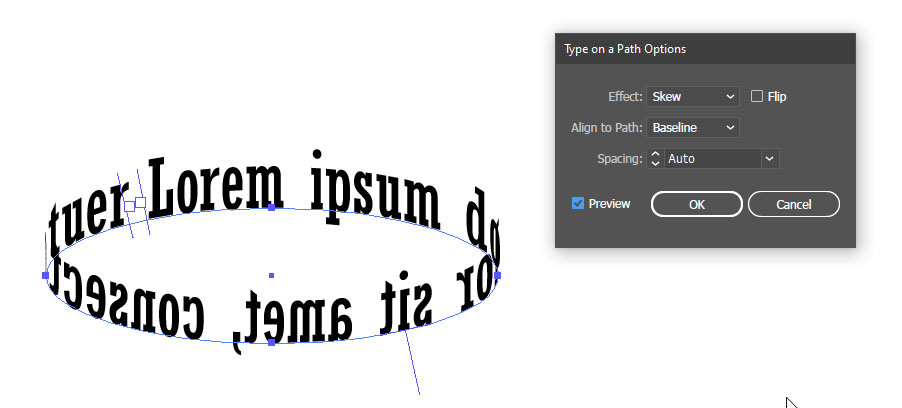
- Go to Type > Type on a Path > Type on a Path Options to change various effects and ways your text is aligned to the curve. You can also use normal paragraph formatting such as center, left or right alignment, or baseline shift.
Simpler way
When all you need is a simple effect like arching or waving text, just go to Effect > Warp menu.
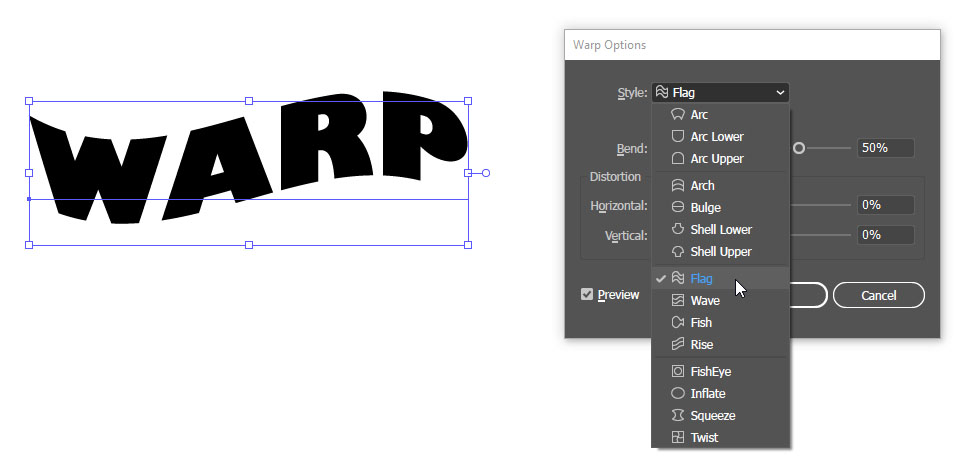
Choose any effect and adjust it in the opened dialog. You can change the effect to a different one right there in the Style option.
Don’t forget to check Preview box at the bottom left to see what the different effects and slider are doing before you apply.
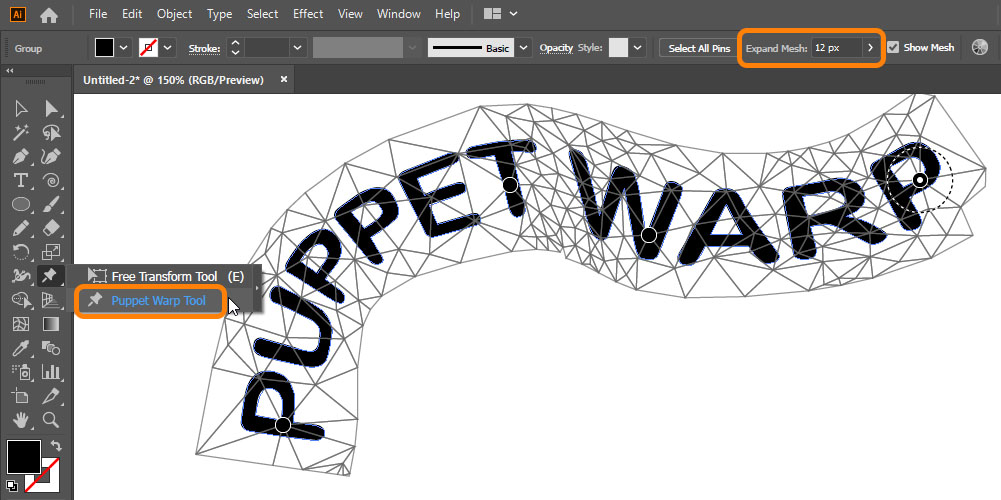
Puppet warp
Puppet Warp is a tool that lets you manually bend any object any way you want and is very simple and intuitive to use.
- Select your text.
- Select Puppet Warp Tool on the Toolbar. It’s under the Free Transform Tool (E). If you don’t see it, go to Window > Toolbars > Advanced.
Illustrator will create a mesh around your text and might automatically add pins, control points with which you can bend it.
But first, increase the Expand Mesh value on the Properties or Control panel until all the letters are enveloped into a single mesh. - Click anywhere on the mesh to add pins, you’ll need at least two or three. Click to select them (Shift-click to select multiple), and drag to manipulate the text. Drag within the pin’s circle to rotate. Hold Alt/Option while dragging to constrain mesh only to selected pins.
Tip: Similar way to do the same thing is through Envelope Mesh. Go to Object > Envelope Distort > Make with Mesh. Use Direct Selection Tool (A) to manipulate the mesh.