Most of us know how to crop an image from its original, rectangular shape into another, usually smaller rectangular shape that leaves unnecessary objects, background elements and people out of the frame.
But not everyone and not at all times is satisfied with the box-y, corner-y shape of a rectangle.
Unfortunately, even at the current level of technological development, image files are only allowed to be rectangular in shape. But that doesn’t mean your image itself has to be a rectangle.
We will use the powers of Photoshop to cut a hole in the box of the four-sided nature of an image file.
Elliptical Marquee
In the same way a square is a type of rectangle, a circle is a type of ellipse. That’s why the tool that can let you draw circles is called Elliptical Marquee.
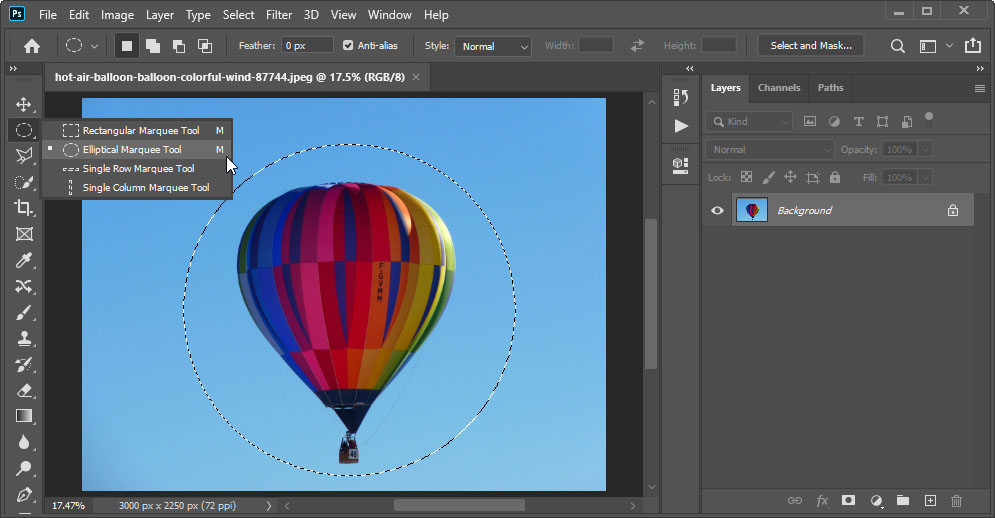
- Click and hold down the Rectangular Marquee Tool‘s icon until a menu pops out that will let you select the Elliptical Marquee Tool.
Tip: You can press Shift + M to toggle between the Rectangular and Elliptical marquees.
- Click and drag on the canvas, while holding Shift to draw a circular selection. Holding down Shift constrains the proportions of your selection to turn the ellipse into an actual circle.
Tip: press and hold Space bar to adjust the position of your selection while you draw it.
Now you have a circular selection, and all you need to do is cut your image to it.
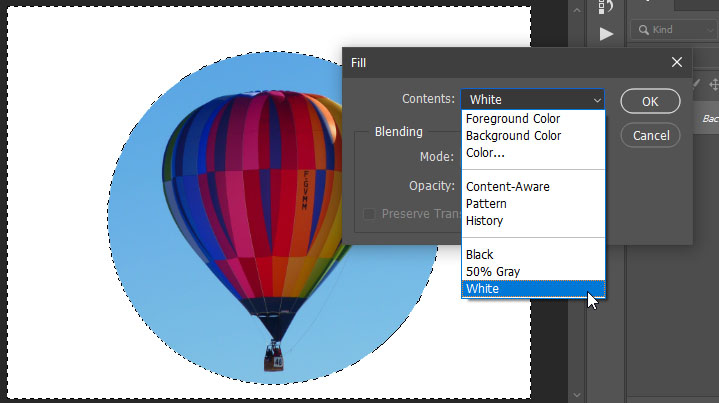
- Go to Select menu > Inverse (Ctrl/Cmd+Shift + I).
- Go to Edit > Fill. In the Contents menu, choose White or Black. Click OK.
Now everything outside of your circle is filled with the color of your choice. Press Ctrl/Cmd+Shift + I again and go to Image > Crop to crop the image to the dimensions of your selection. Press Ctrl/Cmd + D to or click anywhere on the canvas to deselect.
Tip: you can use keyboard shortcuts Ctrl + Backspace or Alt/Option + Backspace to fill selection with your foreground or background color.
Transparency
To bring our image one step closer to a true circle, we need to have transparent background outside of a circle instead of the black, white or other fill color.
To achieve that, we need to remove all the pixels that ruin our circle , away from our image.
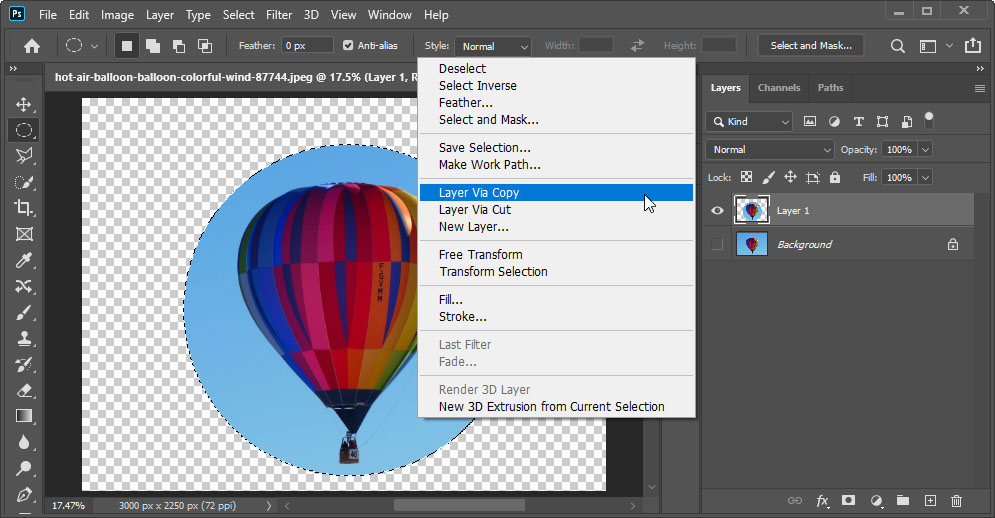
- Make a circular selection with the Elliptical Marquee Tool, holding Shift to draw real, proportional circle.
- Right-click on the canvas and choose Layer Via Copy or press Ctrl (or Cmd) + J.
A new layer will be created containing only what has been inside your circle of a selection.
- Hide the background layer by clicking the eye icon on the left of the Layers panel, or delete it by dragging it onto the Delete layer button.
- Go to Image > Trim and press OK with the default options to crop image to the size of your circle.
Now you can save your file.
Important note: JPEG format doesn’t support transparency. The most common format on the web that does is PNG, so choose PNG format when saving your file.
Clipping mask
Another method to crop to a circle is using what’s called Clipping Mask. It will not only allow you to frame your image to a circle in a more convenient way, but, in the future, to move beyond the circle to more complex, albeit less perfect shapes for cropping your images.
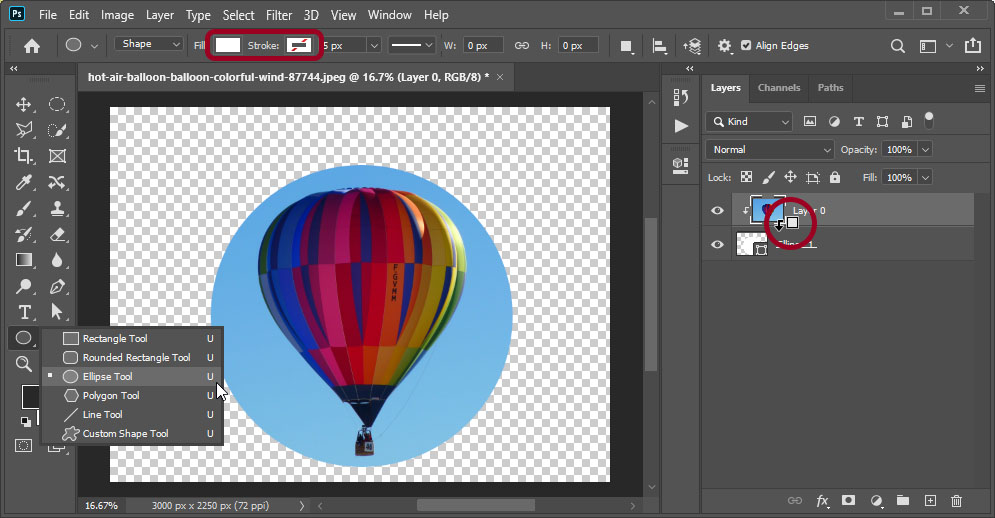
- Press U on the keyboard and notice that you’ve activated a tool on the Tools Panel that lets you create shapes. Press and hold that icon and choose Ellipse Tool from the menu.
- As before, click and drag while holding Shift to draw a circle.
Now you’ve created not an empty selection, but a shape. In the options toolbar, make sure its Fill is set to any color and Stroke is set to No Color.
- Right-click on the Background layer and select Layer from Background, then press OK.
- Drag your image’s layer above the shape layer, so that shape is underneath your image.
- Hold Alt (or Option) key and hover your mouse between the two layers, until strange icon with an arrow appears, and click.
Now the top layer will only show through the shape of the layer below it. It’s called Clipping Mask. You can move and transform both layers freely, making your image appear through the shape of your choice.